Why Use KineMaster for Video Editing?
January 8, 2025 (9 months ago)

Downloading and Installing KineMaster
You can download KineMaster from the Google Play Store or Apple App Store. Install the app and grant it the necessary permissions for optimal performance.
Exploring the Interface
Key Tools and Features
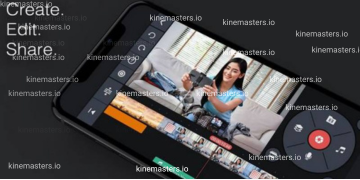
KineMaster’s interface includes tools like the timeline, media browser, layer options, and export settings. These tools simplify the editing process.
Navigating the Workspace
The timeline is the heart of the editor, where you arrange and edit clips. The toolbar provides access to essential functions like trimming, adding text, and inserting transitions.
Creating Your First Project
Starting a New Project
Selecting Aspect Ratios
Choose the aspect ratio that suits your platform. For instance, use 16:9 for YouTube or 9:16 for Instagram stories.
Importing Media Files
Tap the “Media” button to import videos, images, and audio files from your device.
Arranging Clips on the Timeline
Drag and drop media files onto the timeline to arrange them in the desired order.
Previewing Your Work
Tap the play button to review your video in real time. Make adjustments as needed.
Editing Tools and Techniques
Trimming and Splitting Clips
Use the trimming tool to cut unnecessary parts from your video. Splitting allows you to break longer clips into smaller segments.
Adding Transitions
Choosing the Right Transition for Your Video
Transitions like fade, slide, or wipe can make scene changes smoother and more engaging.
Applying Filters and Effects
KineMaster offers a variety of filters and effects to enhance your video’s aesthetics.
Using Text and Titles
Add titles, subtitles, or annotations to provide context or emphasize key points.
Enhancing with Audio
Adding Background Music
Select music from KineMaster’s built-in library or upload your own. Adjust its volume to fit the tone of your video.
Recording Voiceovers
Record high-quality voiceovers directly within the app to narrate your story.
Adjusting Audio Levels
Balance background music, dialogue, and sound effects to ensure a professional audio mix.
Advanced Features
Using Layers for Professional Edits
KineMaster’s multi-layer feature allows you to add videos, images, text, and effects simultaneously for complex edits.
Exploring the Chroma Key Tool
Use the chroma key to replace green screen backgrounds with custom visuals, giving your videos a cinematic look.
Speed Adjustments for Creative Effects
Experiment with slow-motion or time-lapse effects to add drama or excitement.
Exporting Your Video
Previewing and Final Edits
Review your video thoroughly to fix any errors and make final adjustments.
Selecting Export Settings
Choose the resolution and frame rate based on your target platform. KineMaster supports up to 4K export for high-quality results.
Sharing Your Masterpiece
Export your video and share it directly to social media platforms or save it to your device.
FAQs
1. Is KineMaster free to use?
Yes, KineMaster is free, but premium features and watermark removal require a subscription.
2. How do I remove the watermark in KineMaster?
Subscribe to KineMaster Premium to remove the watermark.
3. Can I use KineMaster on a PC?
While KineMaster is primarily designed for mobile devices, you can use emulators to run it on a PC.
4. What are the best export settings for social media?
Use 1080p resolution and 30fps for platforms like YouTube and Instagram.
5. Does KineMaster support 4K video editing?
Yes, KineMaster supports 4K video editing and exporting for ultra-high-definition videos.
Conclusion
KineMaster is an incredible tool for video editing, offering an array of features that cater to beginners and professionals alike. With its user-friendly interface and powerful capabilities, you can create stunning videos effortlessly.
Recommended For You


